

07 Sep How to Build a Kitchen Island from Base Units
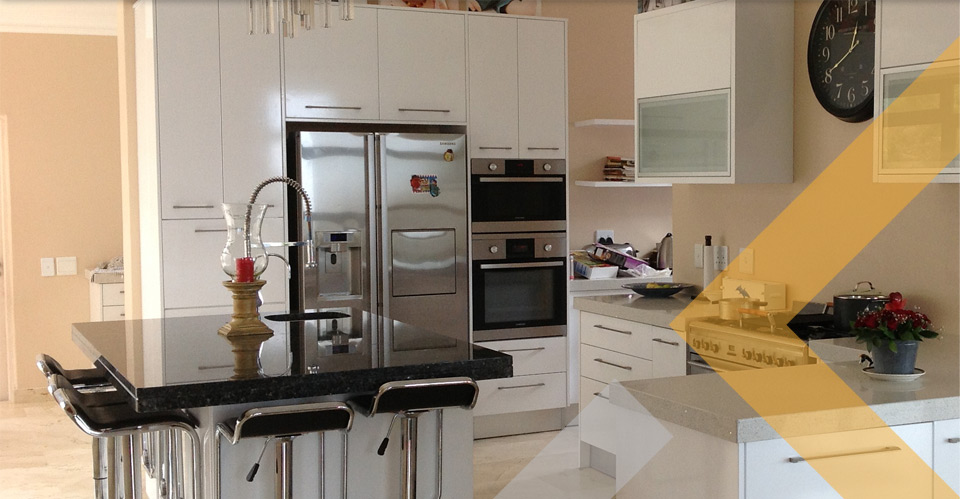
A kitchen island is one of the most requested features in an open-plan kitchen, but a custom-built one can carry a hefty price tag.
The good news is that you can build a sturdy, good-looking island yourself using standard EXPRESS Kitchens floor units, the same factory-direct units used in our regular kitchen ranges. Here’s how to plan and put one together.
Choosing Your Base Units
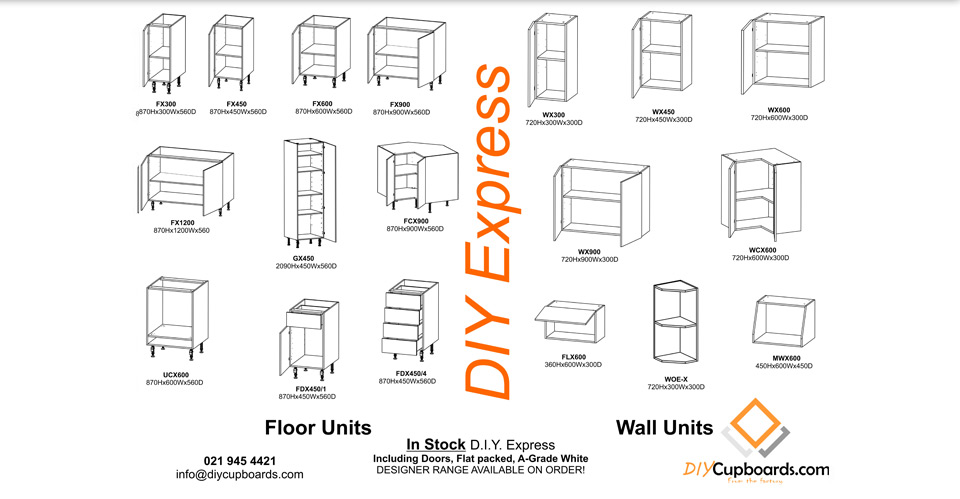
Our floor units come in a range of widths, from 300mm right up to 1200mm, so you can mix and match to reach the footprint you want.
A popular starting point is our 900mm kitchen floor unit, which gives you a generous single-door or drawer section, but combining two or three smaller units side by side works just as well if you’d like a mix of drawers and cupboard space along the island’s length.
Sizing and Clearance
Our floor units are 870mm high and 560mm deep, in line with standard kitchen countertop heights, so they slot straight into an island footprint without any extra framing.
Beyond the units themselves, leave at least 900mm of clear walkway on every side of the island, and closer to 1,100mm to 1,200mm on the side people will be cooking or working from, so doors and drawers can open fully without anyone getting boxed in.

Joining the Units Together
Line your chosen floor units up back to back or side by side depending on the shape you’re after, then screw them together through the internal side panels so the whole run behaves as one solid unit rather than several separate cupboards.
If any side of the island will be visible from the room, use a matching end panel to hide the raw board edge and give the island a finished look from every angle.
Adding a Worktop
Once your units are joined and levelled, a worktop ties the whole island together and gives you the work surface that makes an island so useful in the first place.
If you’d like an overhang for seating, make sure the units underneath are securely fixed and that the worktop or its supporting brackets are rated for the extra weight of someone leaning or sitting on the overhanging edge.
Adding Seating
A worktop overhang of around 250mm to 300mm on one side gives enough knee room for bar stools without needing extra bracketing in most cases, though a longer overhang is best supported with corbels or a bracket underneath. This turns your island from pure storage and prep space into a spot for quick meals or for chatting to whoever’s cooking.
A Matching Tall Unit to Finish the Run
If you’d like extra storage alongside the island rather than within it, our 900 Combo cupboard makes a good tall end-of-run unit for pantry items, cleaning supplies or an ironing board and vacuum cleaner, positioned next to the island rather than built into it, since its 2100mm height suits standing storage rather than a countertop run.
Getting the Layout Right Before You Buy
An island only works if the surrounding layout supports it, so it’s worth reading our guide to designing a kitchen for small spaces before you commit to a footprint, especially in an open-plan home where the island needs to fit comfortably between other zones.
If you’d rather not measure and plan alone, our DIY Designer service can work out unit sizes, panel requirements and a free 3D design based on your space.
Ready to plan your island? CONTACT US to book a free 3D design, or shop our floor units online today.
Browse the range or get help from a designer
Standard-size flat-pack units priced factory-direct, plus free 3D design help if you want a custom layout.
Browse the shop Talk to a designer
Factory-direct prices · Nationwide delivery · 4.6★ on Google
Sorry, the comment form is closed at this time.